Use registration marks or blocks to help align layers of vinyl – Vinyl is a versatile material that is used for a wide range of applications such as signage, vehicle graphics, and decals. When working with vinyl, one of the most important aspects is ensuring that different layers align properly to create a seamless design. One way to achieve this is by using registration marks or blocks.
Use registration marks or blocks to help align layers of vinyl
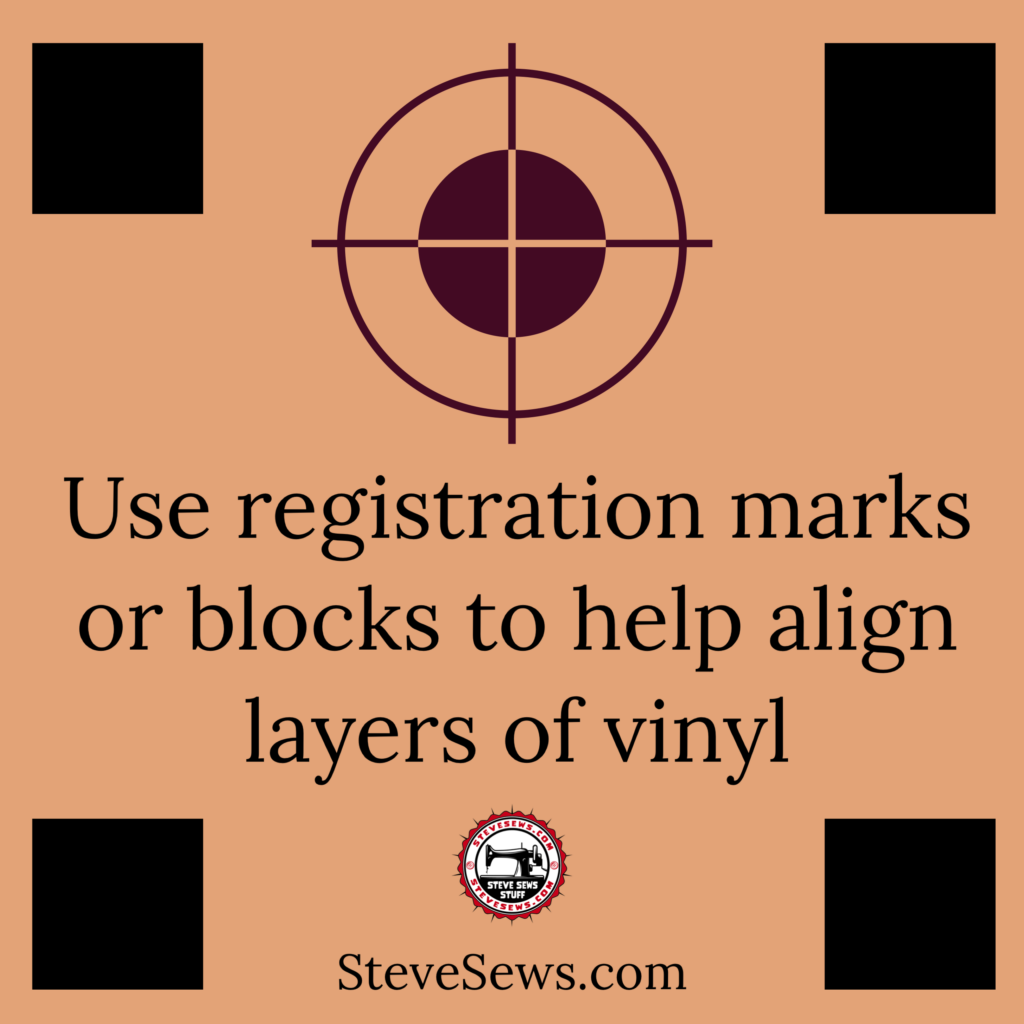
Registration marks or blocks are small markings that are placed on the vinyl material to help align different layers. They are typically small squares or circles that are strategically placed on the vinyl material. The marks are printed on each layer of vinyl and are used to align each layer perfectly.
These marks work very similar to that in the graphic design and printing industry.
Here are some tips on how to use registration marks or blocks to help align different layers of vinyl:
- Plan your design: Before you start cutting or printing your vinyl, it’s important to plan your design carefully. This will help you determine how many layers you need and where the registration marks or blocks should be placed.
- Use a consistent design: To ensure that the registration marks or blocks line up perfectly, use a consistent design for each layer. This could be a simple shape or a logo that is repeated on each layer.
- Place the registration marks or blocks: Once you have your design planned out, it’s time to place the registration marks or blocks. These marks should be placed in a consistent location on each layer of vinyl. Make sure that the marks are placed in a location that is easy to see and won’t be covered up by other elements of your design.
- Cut or print your vinyl: Once the registration marks or blocks are in place, you can start cutting or printing your vinyl. Make sure that you use the same settings for each layer of vinyl to ensure consistency.
- Align the layers: Once you have all of your vinyl layers cut or printed, it’s time to align them. Use the registration marks or blocks to line up each layer perfectly. Once the layers are aligned, use a squeegee or other tool to press the layers together.
Using registration marks or blocks is a simple and effective way to ensure that different layers of vinyl align perfectly. By following these tips, you can create seamless designs that are sure to impress.
You could make square blocks for this process. If you forget to remove those blocks, you end up with them on your project.
Upcoming Events
This is a list of the upcoming events that Steve Sews will be at. If you know of one in the East Tennessee area, let me know.
None at this time. Check back later.
Meet …
Meet the staff and/or equipment for Steve Sews.
- Brother Stitch (Current Sewing Machine)
- Forge (Circuit)
- Interns
- Lovees (Stuffed Animals)
- Mendi (My Wife’s Sewing Machine)
- Rosie (Antique Sewing Machine)
- Steve (Steve himself)
- The Masked Bandit (Steve’s older Sewing Machine)
- Trainees
- Van the T-Rex (Helper)
- Zee (Face Mask Model)

SUBSCRIBE TODAY!
Don’t miss a single blog post about sewing, quilting, crafts, and recipes! Plus so much more!

Follow on WordPress
Follow Steve Sews Stuff on WordPress.comFollow Steve Sews Stuff on Social Media:
You can also choose to follow Steve Sews Stuff most social media as well. (@SteveSews2)
Below are some examples of blog entries from all blogs that I do. (Courageous Christian Father, Steve Sews Stuff and SteveZ DesignZ).
Recent Feed of All of Steve’s Blogs

Recent Posts on Steve Sews
Below is a list of the most recent blog posts found on Steve Sews for you to check out.
- Sewing Machine Cake
 Sewing Machine Cake — Cake Artist, Mr. Sugar Cakes creates a Singer Heavy Duty Sewing Machine cake. #MrSugarCakes #SingerSewingMachine
 - Sewing Machine Chainsaw Carving
 Sewing Machine Chainsaw Carving — Creativity knows no bounds and this stunning chainsaw carving that transforms the trunk of a tree into an ornate sewing machine. The intricate designs and detailed patterns carved into the wood mimic the mechanical parts of a real sewing machine, showcasing an extraordinary level of skill and artistry.
 - Bow Tie Day
 Bow Tie Day: A Stylish Statement with a a fun and quirky holiday that celebrates the timeless elegance and charm of the bow tie. While it doesn’t have a fixed date, it’s often observed on special occasions or simply as a way to express personal style. #bowtieday
 - Morgan County Chamber of Commerce & Visitor Center Barn Quilt
 Morgan County Chamber of Commerce & Visitor Center Barn Quilt features a friendship star design on the quilt block. #MorganCounty
 - Add a Penny to Your Quilt
 Add a Penny to Your Quilt: Adding a Touch of Time — Have you ever thought about incorporating a little piece of history into your quilt? Adding a current year penny is a unique and meaningful way to do just that. It’s a small detail that can add a big impact to your finished project.
Clipart: Unsplash, Pixabay, Pexels, Openverse, Adobe Express, Adobe Stock, FreePik, MetroCreative, Wonder AI, Algo AI and more. This site uses Amazon Affiliate Ads & Google Ads.
